How to easily hang a large gallery wall

I've hung large gallery walls for clients when I was working at a design firm, but recently I decided I wanted a family photo gallery wall down our hallway. A large 20ish piece gallery wall (cue Luke getting stressed). But I have a few tricks that help make it SO MUCH easier and dare I say stress free? Luke even mentioned how easy it was- and we hung 18 frames in less than an hour. 
BEFORE: I'm standing in my living room taking this picture and you can see the wall where the gallery wall is going peeking out. 
Also these light fixtures for my hall are so fun and only $30! My friend Briana (who is so talented and you should be following her NOW) found them for her hall and I totally copied her and now we are light twinsies. Anyhow- I got the oil rubbed bronze version and sprayed them black.  
I knew I wanted to remove that frame and the doorbell. WHY do people hang doorbells (and thermostats???) right in the middle of the wall? After we had a blank wall I went to Ikea's website and got the sizes of 3 different frames and used a craft paper roll to cut out about 10 templates of each size. I then used washi tape and played with the templates on the wall until I had the layout I wanted.
When you get to hanging the frames I find its easier if you have several pictures on the same line so the hanging measurements are the same. You can see how the three pictures on the left are in a vertical line and how the bottom row has 4 pictures that are different orientations but the same vertical height. This helps! 
All 18 of the Ribba frames ready to go. 

Then grab your laser level. Thank goodness for laser levers. The frames that are on the same line we would hang the two nails for one frame and then laser level the line up and go ahead and mark on the paper the next two or so frames and nail them all in at one time. Also using two nails to hang is so much easier! You don't have to get the center because the frame will sit on the two nails and you can slide to the left and the right to make sure its lined up with the other frames below and above it. We spaced our nails about 2 to 4 inches apart depending on the size of the frame. This also helps it hang straight and not get crooked like they do when you hang on one nail.
Progress! After you nail in the nails over the paper, rip the paper off the wall and your marks are gone and you are left with a clean wall! 

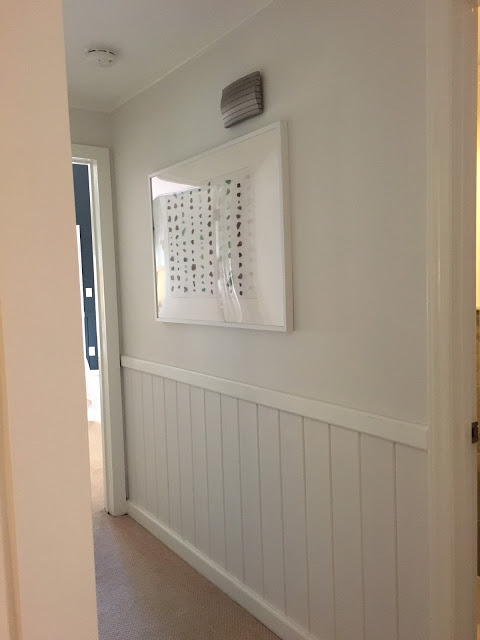
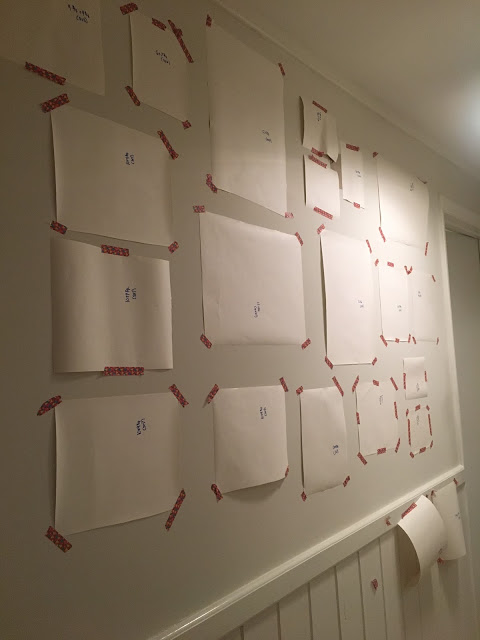
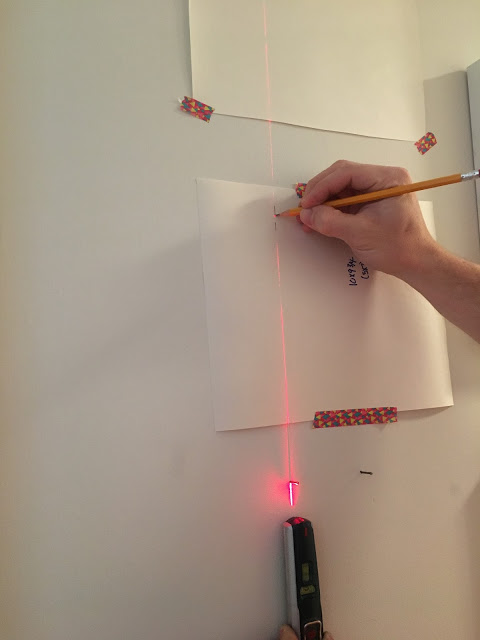
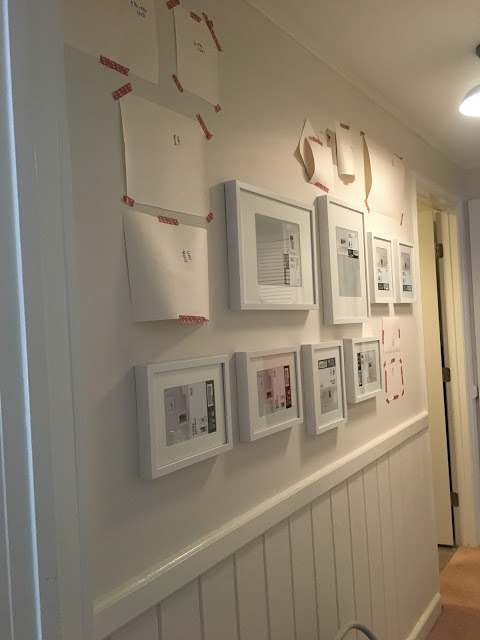
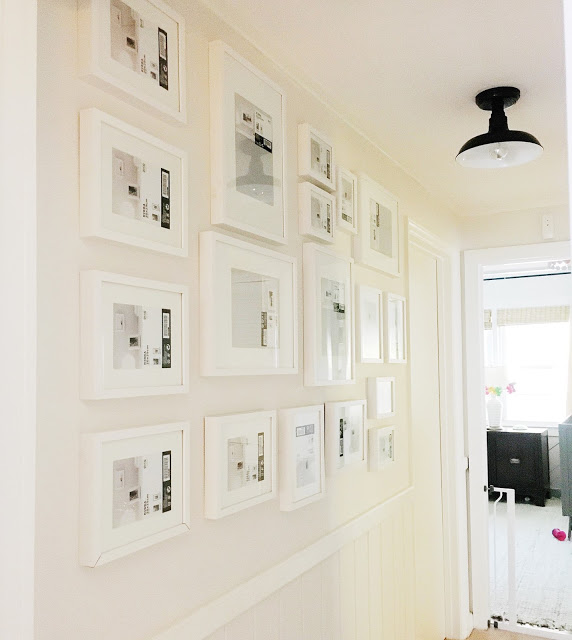
Final! I ordered all my family photos from Shutterfly and can't wait to get them in! What do you think about my system? It makes it so much easier and not as stressful because you can see your layout completely before you hang. It has helped me so much and I hope it helps you!